Context
This post is part of the homework for the Human-Computer Interaction for Mixed Reality course I’m taking at Telecom Paris. As a course project, I had the opportunity to imagine one locomotion technique for VR environment that I found interesting and implement it in Unity for Oculus Quest. We were provided a “parkour” scene to use as an evaluation method for a technique.
Goal:
The goal of the project is to be able to induldge in a design process in the context of virtual reality, to pitch the idea, to implement it and to present the results. The implementation can be seen as a mapping of the controller+HMD input to a movement in the scene. This mapping should allow the player to be able to run around a track with coins to pick and differents challenges like turns and elevation variation. The design process should take into consideration some metrics (speed, accuracy, enjoyment, motion sickness, …) as target. The proposed solution should perform well with regard to a susbset of these metrics.
Idea:
I wanted to work on a locomotion technique that is inspired by nature. The idea was to mimick the movement of an animal that has similar locomotion patterns as humans and yet still different and interesting to test in a VR context. I had two sets of constraints:
- the actions to be performed should be easy for the users (physically feasible).
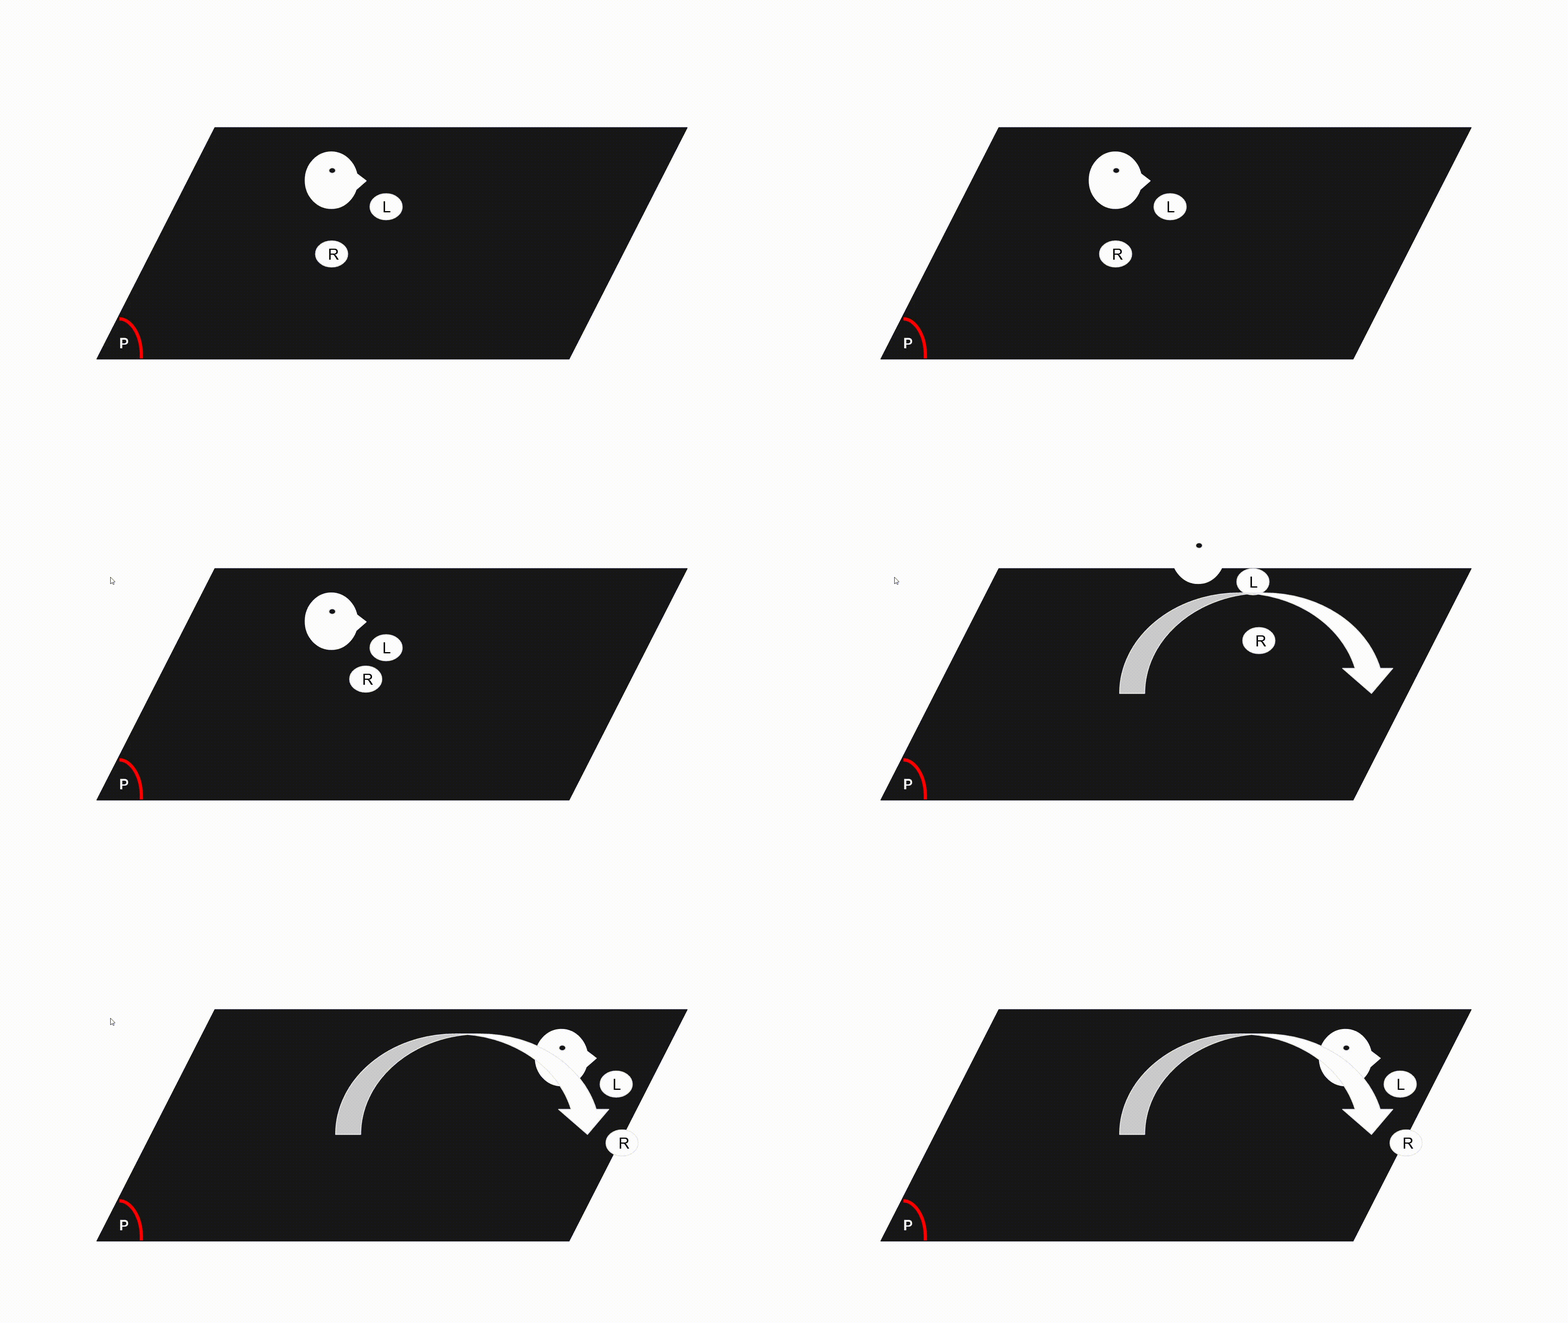
- the actions to be performed have to be captured using the tracking of the HMD and the controllers and thus should be restricted to hands and head movement. I then found a game on Steam called “Gorilla Tag” that uses the kind of idea I was looking. I thought it would be fun to try and find a way to implement a similar mechanics. Of course, I aimed at a more simple version. My idea was to make the user hit the “ground” and according to this hit, he is propelled in a parabolic jump as explained in the following prototype.

Implementation:
Brief description of the base project:
“VR-locomotion-parkour” is a unity project that was setup to have the same evaluation environment for all the locomotion techniques that would be developed in the context of this course (7 students). It contains a scene with a track that the player should complete while collecting coins. The project is already configured to work for oculus quest and
uses the oculus integration package. We have an OVRCameraRig gameobject that takes care of the basic VR features (display, tracking, …)
The task is then to implement the necessary elements (gameobjects, scripts, …) to move this OVRCameraRig in the scene according to the user’s intention.
My solution:
Preparations:
To implement the “jump on hit ground” mechanic, I started by using two main components:
-
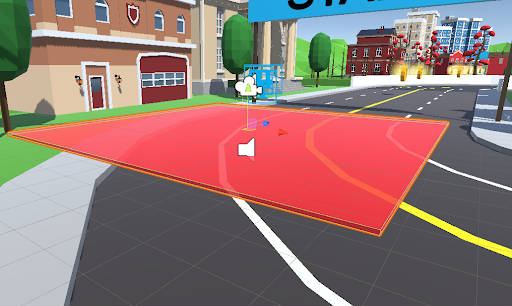
A CollisionPlan gameobject that I fixed as an offset below the user’s head (placed slightly above the waist for a stand-up posture). This plan is used to detect collisions with the controller and flag it while recording the on collision velocity of the controller. This is done by creating a CollisionPlan gameobject (using a cube primitive) and assigning to it a PlanScript.cs script. The code is quite simple and can be found in my github repo.
 !!! One thing to note is that I tried to avoid using the physics engine with OVRCameraRig child elements. I suspected it may cause some unwanted behaviour. For that, I used triggers instead of collisions. All you need is for your plan and controllers to contain box colliders and to add a rigid body to the plan and set it to IsKinematic.That way, the OnTriggerEnter would be called for the CollisionPlan gameobject each time the controller hit it.
 -
A VelocityChecker.cs script that I assign to each one of the controllers. The code is also straightforward and calculates on update the current velocity of the controller.
    newpos = transform.position;
    var diff = newpos - oldpos;
    velocity = diff / Time.deltaTime;
    oldpos = newpos;
This is needed since I’m avoiding the physics engine for this application. The velocity attribute is set to public and is retrieved on collisions by the CollisionPlan using this line of code:
CollisionVelocity = other.gameObject.GetComponent<VelocityChecker>().velocity;
First iteration:
Having all this set, we can now discuss how I used these components to move the player according to the way they hit the ground.
It all goes back to updating the transform.position of the OVRCameraRig. This is already set up in the base project with the LocomotionTechnique.cs script attached to this gameobject.
I started by adding the following attributes to the script:
    public PlaneScript plane;
    bool isMoving;
    Vector3 currentStartVelocity;
    Vector3 currentStartPosition;
    float movementTimePassed;
plane is there to retrieve the collision information exposed by the collisionPlan:
- The flag collided indicating whether the user did hit the ground recently or now.
- The vector3 CollisionVelocity containing the potention on collision velocity of the controller.
- The flag isRightArm to diferentiate between the two controllers.
When the user hit the “ground”, the flag isMoving is set to true to indicate that we are in the state of “jumping” movementTimePassed is set to zero in order to start recording how much time passed since we initiated the jump.currentStartVelocity and currentStartPosition are used to retrieve the corresponding values on collision.
!!! I should note that currentStartVelocity should be set to -CollisionVelocity. The player should move in the opposed direction of the hit. “simple physics :)”
While the isMoving is true and we didn’t reach our target position, we stop recording new hits and we move the player according to a simple parabolic jump move.
transform.position = 0.5f * g * movementTimePassed * movementTimePassed + currentStartVelocity * movementTimePassed + currentStartPosition
I keep updating this position according to this moving position until we reach our starting elevation (transform.position.y == currentStartPosition.y). in that case, I set the flag isMoving to false to stop the jump and I set plane.collided to false to skip any “ground” hit done during the last jump. We than wait for the next “ground hit”.
This iteration proved to be quite good but I rapidly stumbled upon two main issues:
- The input velocity is too noisy and the user has very low control on which direction to go. A too powerful hit will give an uncontrolled big jump that may induce serious motion sickness. A small variation of the direction of the hit can give a jump in a very different direction than the one the pllayer is aiming at.
- When there is an upward or downward slope in the ground, the movement do not take that into consideration.
Second iteration:
To solve the aforementioned issues, I added two additional main components:
- A GroundChecker gameobject that follows the OVRCameraRig from above. This component aims at taking into account the ground elevation variation into the equation. This is done by assigning a GroundChecker.cs script to this object. To follow the user, on updates it sets the x & z coordinates to those of the player while fixing the y coordinate to 55. To handle the ground checking, it uses ray casting. On start, it calculates an offset between the viewed ground elevation (hit position) and the player’s y cooridnate. This offset is exposed as public for further calculations. It exposes also a checkGround() method that returns the current viewerd ground elevation.
    public float checkGround()
    {
        float res = 0;
        RaycastHit hit;
        if (Physics.Raycast(transform.position, transform.TransformDirection(-Vector3.up), out hit, Mathf.Infinity, LayerMask.GetMask("Terrain")))
        {
            res = hit.point.y;
        }
        return res;
    }
!!! I should note that this function do not handle well the case where there is no ground hit or when the ground is higher than 55 and further improvements should be implemented for a more robust application. The previous movement equation is then updated by adding the following term to the calculated transform:
(MygroundChecker.checkGround() + MygroundChecker.Offset) * Vector3.up
We also change the “end jump” condition to
transform.position.y - MygroundChecker.checkGround() <= MygroundChecker.Offset
That way the parabolic jump is calculated according to a flattened version of the track and we then add the necessary offset. One last thing to change is to add a tiny vertical offset to the OVRCameraRig’s position when a “start a jump” is issued so that the “end jump” condition is not true before the jump. This is done in the following line.
transform.position = new Vector3(transform.position.x, MygroundChecker.checkGround() + MygroundChecker.Offset + 0.001f, transform.position.z);
- The second component is a filtering process applied to the input velocity. I decided to work in the player’s view space (Centereye’s transform) since it contains the most relevant information on the user’s intent. I thought it would be more iteresting to have the direction of the jump decided according to where the user is looking. This would lead to an easier control. To have that effect, I first retrieve the input velocity’s upward and forward components in the player’s view space and clamp them to a smaller range of values to avoid uncontroller jumps. The right component is too noisy and is less relevant since we want a jump in the forward direction. For that, I set it to a small constant value and had its sign decided according to which hand was used.
    float forwardPower = -3 * Vector3.Dot(plane.CollisionVelocity, Centereye.forward);
    float UpPower = Vector3.Dot(plane.CollisionVelocity, Centereye.up);
    float rightPower = plane.isRightArm ? 0.2f : -0.2f;

    forwardPower = Mathf.Min(forwardPower, 8);
    UpPower = Mathf.Min(UpPower, 5);
final iteration:
The second iteration was cool and all but still missed something: super jumps :)
By clamping the forward and upward components of the input velocity, I lost the ability to jump high enough to catch floating coins and the ability to move fast enough forward to avoid multiple jumps in empty areas. To solve this issue, I mapped two special actions to the “X” and “A” buttons.
    if (OVRInput.Get(OVRInput.Button.Three))   // X
    {
        // Super jump forward
        forwardPower = 18;
        UpPower = 7f;
    }
    else if (OVRInput.Get(OVRInput.Button.One)) // A
    {
        // Super jump upward
        forwardPower = 7;
        UpPower = 12;
    }